
Building a Suspended G Scale Layout
In early 2013 I started looking into the pre-built hanger systems to suspend a simple G scale oval layout from the ceiling in my parent's Rec room. What I quickly discovered is that these systems were extremely expensive even for the tiny 4-foot radius kits. I wanted to have minimum 8-foot diameter curves to run heavyweight passenger cars, so I ended up deciding that it would be cheaper just to just build my own.
The plan was to have a 20x8 oval, and I was able to snipe the LGB 16000 curves and LGB 10600 straights I needed off of eBay relatively cheap. For the layout system itself, I decided go all-out for an elaborate trestle-like architecture and use 1/2" and 3/4" wooden dowels. To keep things modular, each roadbed piece would be the length of one piece of track, and the pieces would be joined by a bracket that suspended them from the ceiling.
Straights
A single piece of LGB 10600 track (or two 1000 pieces) is 23 9/16" long. I used two 3/4" dowels (cut to 23 9/16" long) with 1/2" dowels cut to 5 1/2" going across them to build the support pieces for the straight runs. Each horizontal 5 1/2" piece supported a tie of the track. I needed to make 12 pieces of straight roadbed, so I created a jig to help me space the ties. In the picture below, my two 3/4" dowels have been cut to 23 9/16" and are awaiting the 1/2" dowel ties. Since the track is roughly 3 1/2" wide, aligning the ties with 1" of overhang from the 3/4" support dowels resulted in a centered base.
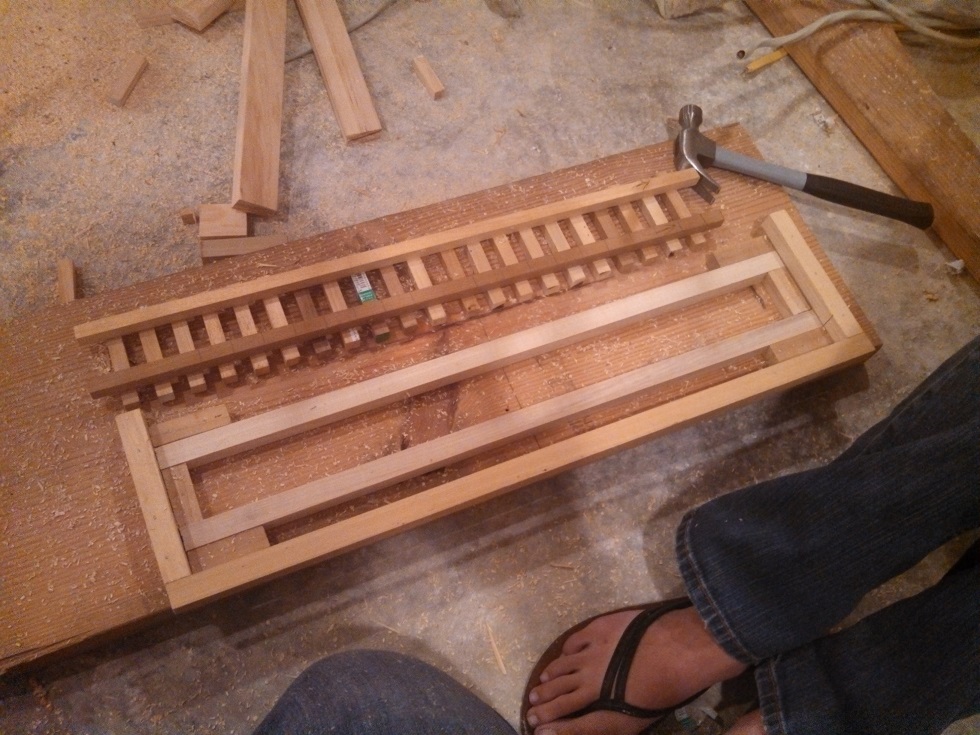
The top half of the jig is then laid on top of the bottom half and a bunch of 1/2" dowels cut to 5 1/2" long are slid into the empty slots:
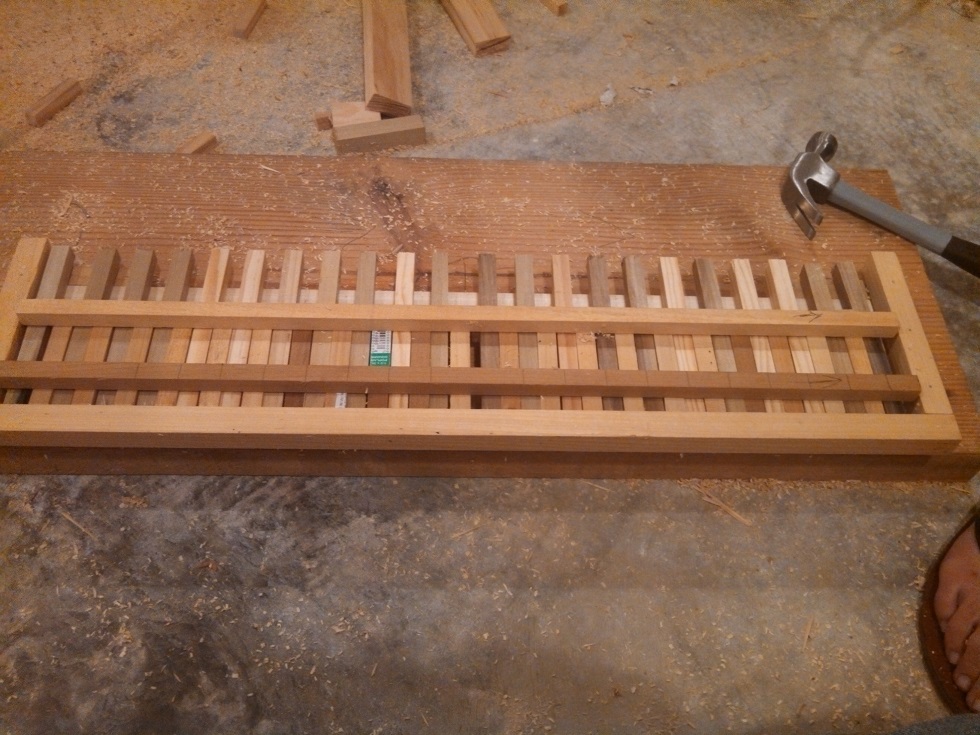
With the ties in place, I used 1" brad nails to attach the ties to the underlying frame before removing the top-half of the jig. It was overkill, but I put two brads on each side of the tie to prevent the finished roadbed from pivoting. A small dab of wood glue would also work:
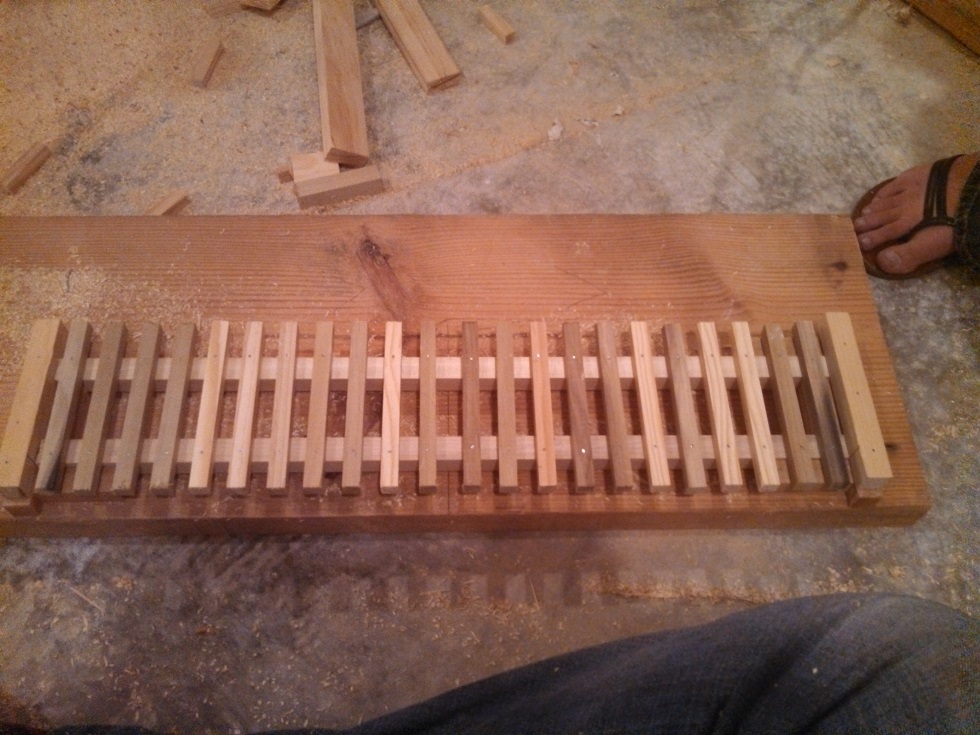
The finished result was a ready-to-stain piece of support roadbed:

Curves
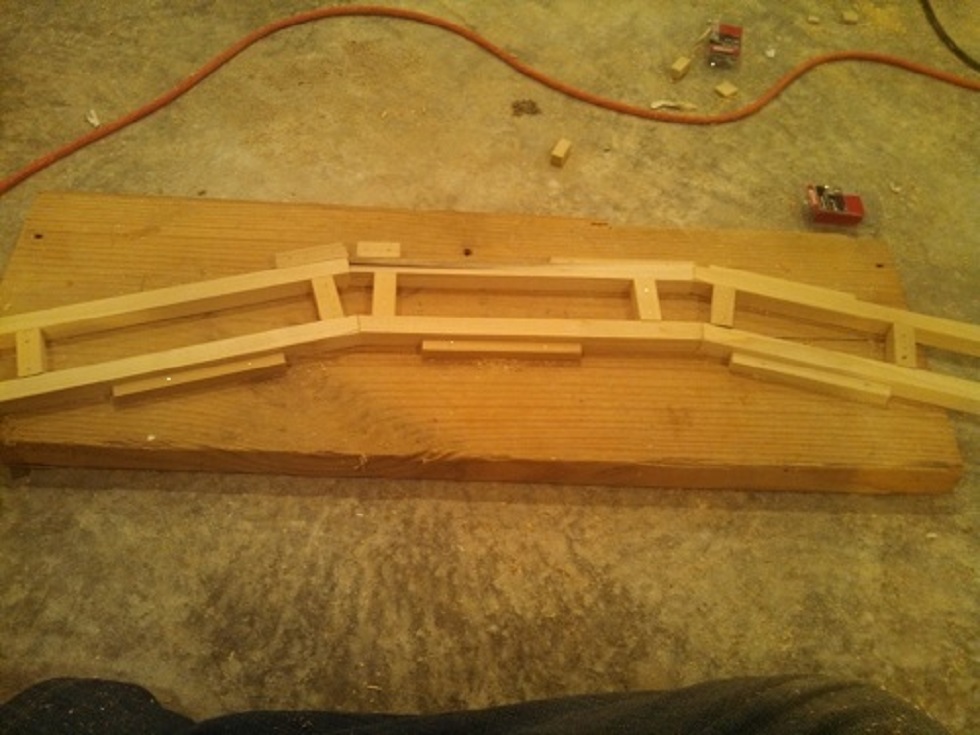
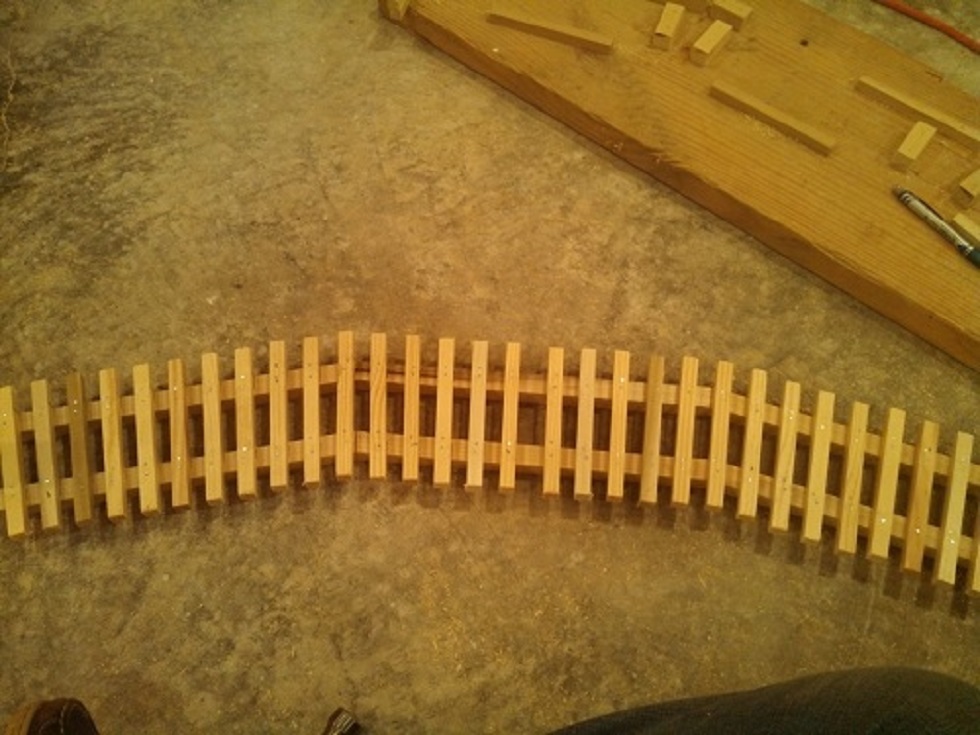
The curves were a bit more difficult to make than the straights. I played around with bending dowels and even built my own steambox, but ultimately decided that a segmented circle was the way to go for me. After a bit of math and tinkering, I built a jig that would create a piece of roadbed for two LGB 16000 curves. Since it's a segmented circle with a gap between the ties, I actually ended up with dimensions for both an 'inner' and 'outer' segemented circle.
The length for each inner segment piece ended up being 12 1/16" long and the outer segment pieces were 12 11/16". These pieces were segmented together in sets of three after being cut at a 15' angle. The result was 8 pieces of curved roadbed, each capable of holding two LGB 16000 pieces of track.
The only jig I made for the curved pieces involved lining up the segmented pieces to glue and peg them together.
I didn't make a 'top half' of the jig to place the ties. I just put the track on the assembled segments in the bottom jig and traced where the ties would go.
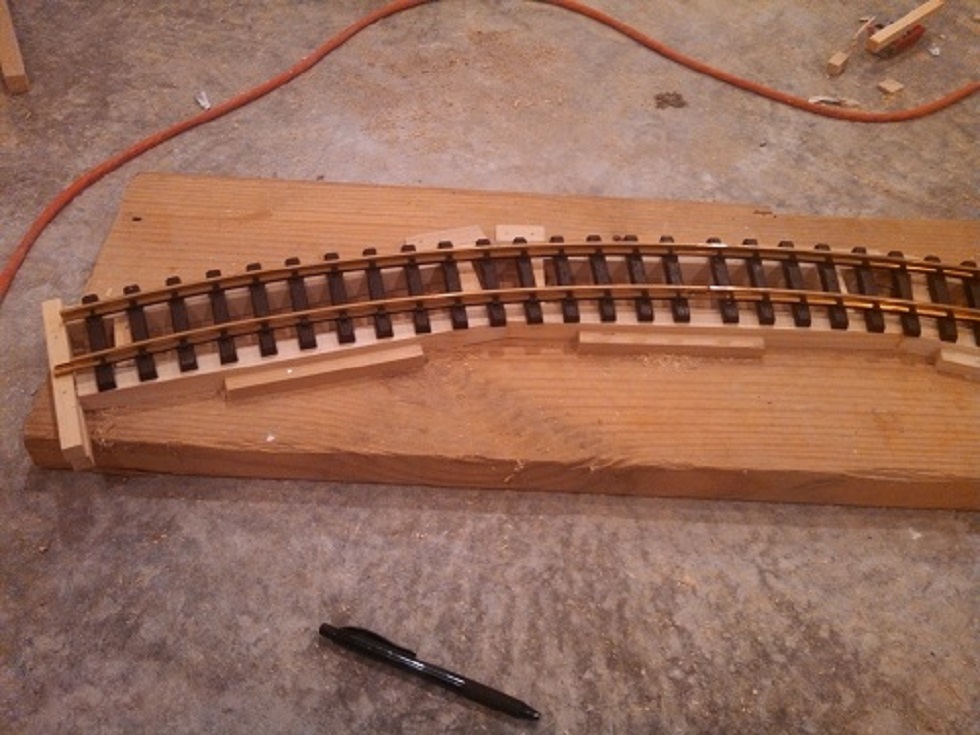
To line the ties up horizontally on top of the segments, I measured marked them 1" from the ends to know where to align them against the segmented base. This resulted in 1" of 'overhang' much like the straights.
The finished product is a curved piece of roadbed capable of supporting two LGB 16000 pieces of track.
NOTE: For additional strength on the curves, I strongly recommend adding another 3/4" support to the bottom of the curved piece through the middle that touches all three segmented pieces of roadbed. This additional support will reduce the chances of a curved piece breaking after repeated use and allow you to run heavier locomotives.
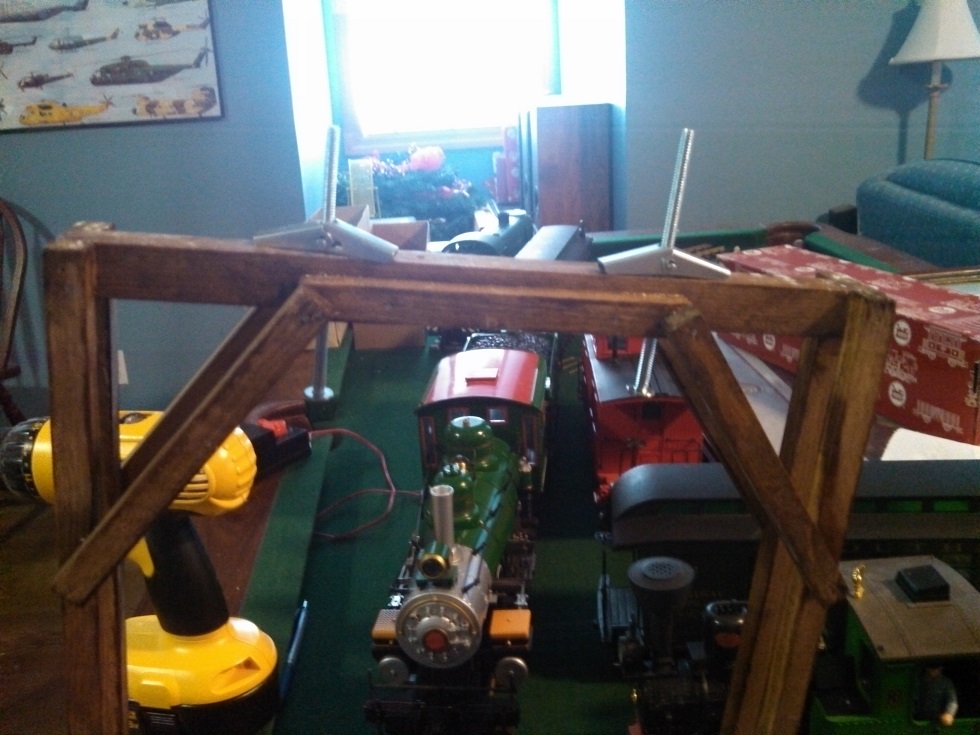
Brackets
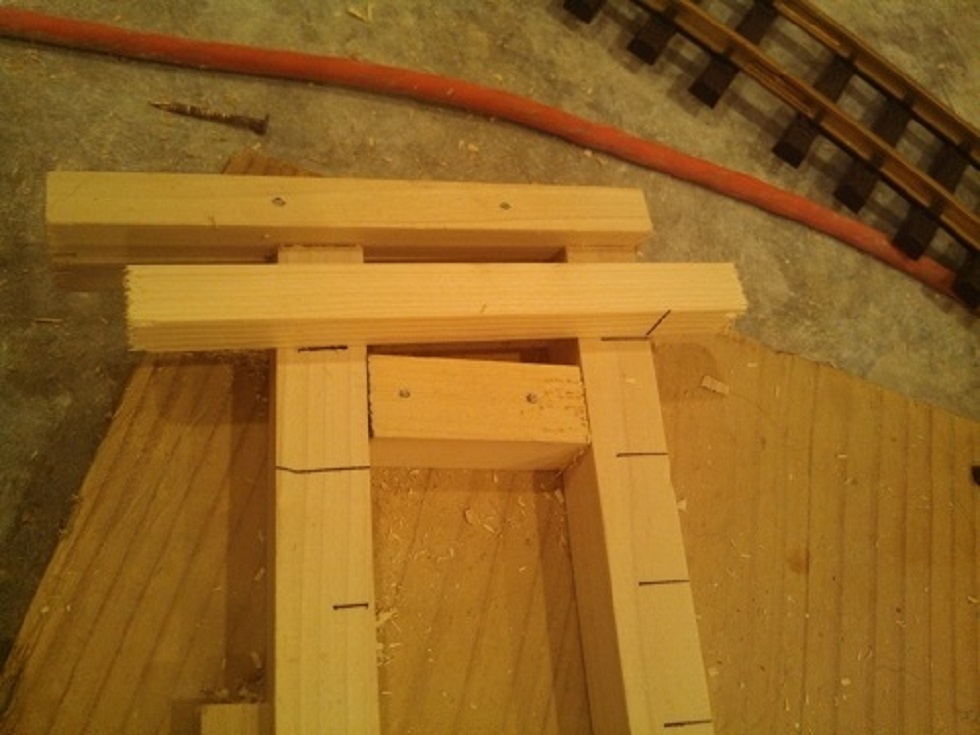
Brackets were pretty fun to make. The brackets used two 3/4" dowels cut to 12" length for the width, and then four 1/2" dowels cut to about 15" each for the length and then assembled by attaching the 1/2" dowels to the 3/4" dowels to make a square bracket. The length can be modified to fit your needs, but most G scale equipment needs at least 9" of clearance. Remember that a couple inches are going to be lost by the roadbed sitting inside the bracket, so shoot for a minimum of 13" length. Additionally, I cut a total of 12 more 1/2"x5 1/2" dowels (ties) per bracket to add as decoration and give the roadbed just a little bit more support.

After assembling the outer part of the bracket, I went back and added the 5 1/2" pieces I cut by attaching four to the 3/4" dowels (two on each side, oriented towards the inside of the bracket), and then added two more diagonally connected to the sides to give it a little bit more flair. That's probably clear as mud, so here's a picture:
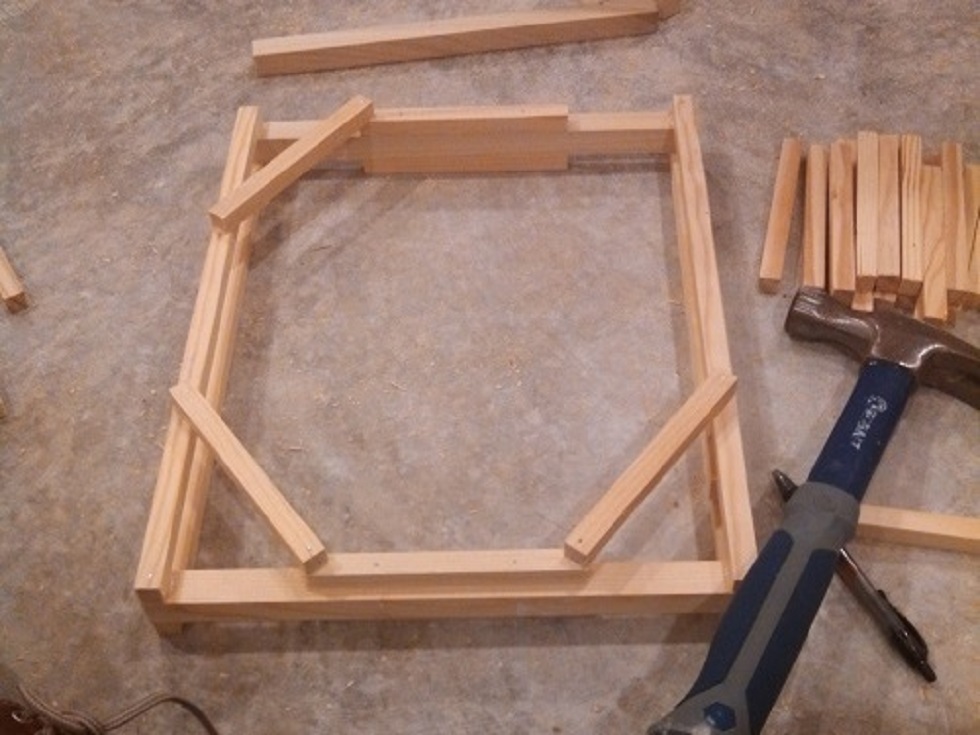
You'll need one bracket per piece of roadbed, assuming you're making a circle or oval. I used a small dab of wood glue just about everywhere a brad nail went on these to add additional strength.
Everywhere my layout has been installed I had flat ceilings, but that might not always be the case. Wall-mounted brackets would be easy to build, and my design for this bracket could be modified for vaulted ceilings by making two of the vertical pieces longer than the others (You would need to use geometry to figure out the dimensions based on the angle of your ceiling).
Staining
Before installation, I needed to stain all the roadbed pieces and the brackets. I picked up two quarts of "Early American" stain from Home Depot and it was enough to hit the entire project with two coats. I choose Early American because I was going for more of a old-timey look and feel, but just about any color will work fine. I used a simple 1/2" foam brush to stain the entire project.
Many people have commented that it would have been easier to stain the wood before assembling the pieces, but I used wood glue on many joints to help strengthen the system and wood glue does not stick to stain very well.
Installation
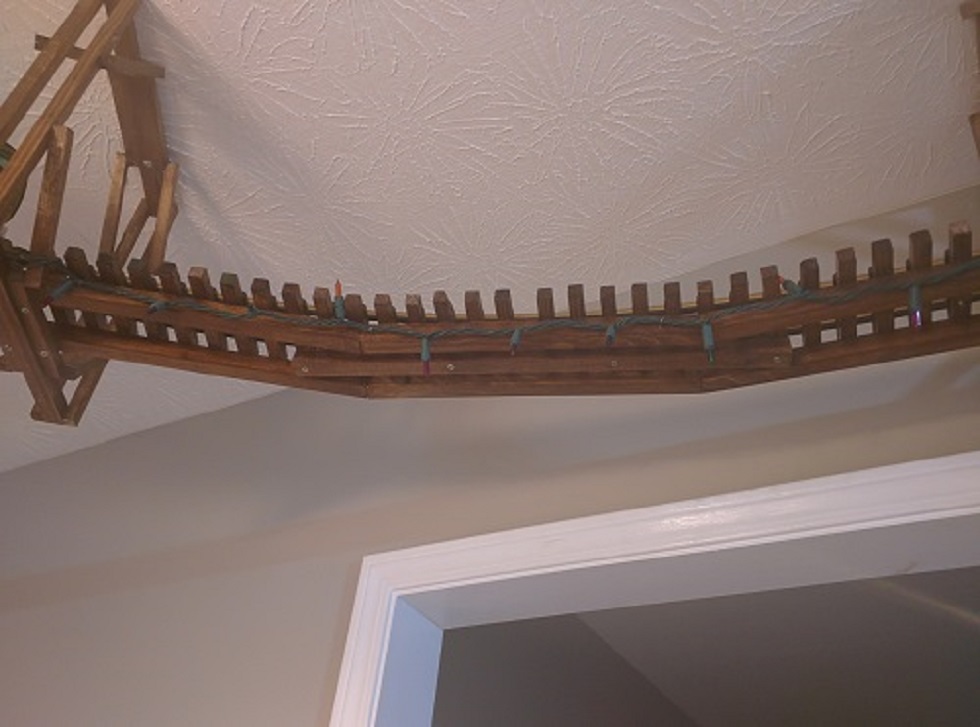
Once all the pieces were built, it was time to install the layout. The most important thing to remember when putting something like this up is that it is an elongated circle, and the sides of a circle need to meet at the same place on both sides. To make sure everything matched up when I was done, I took the measurements of the entire ceiling, calculated where the brackets would need to go in relation to the nearest wall, and built from there.
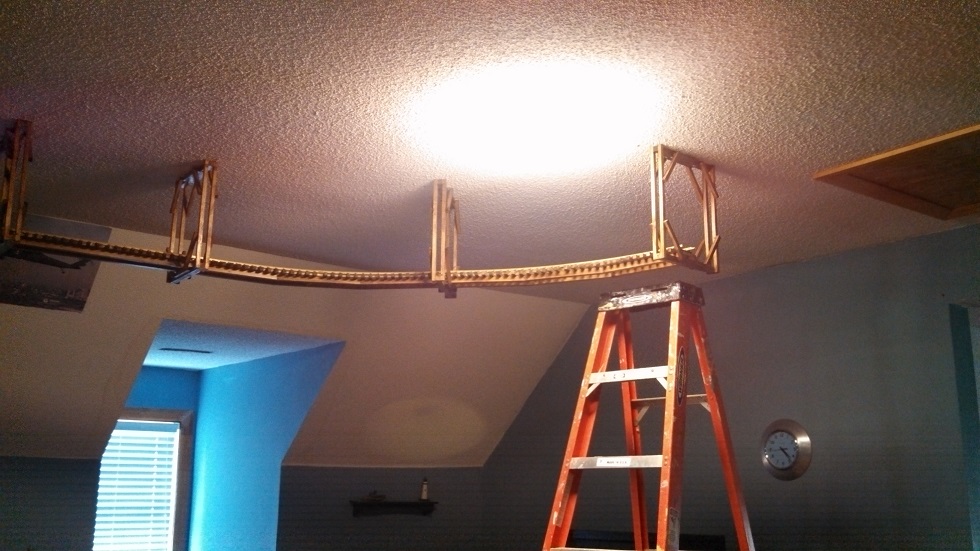
To install the brackets, I drilled two holes a few inches a part and fitted them with 5"+ toggle bolts. I then drilled holes through the ceiling and popped the brackets into place. For instances where I happened to run into a joist, I just used a simple wood screw.
Costs (8'x20' oval)
I wasted a lot of materials through trial and error, but here's a bill of materials and the approximate cost for someone starting this project knowing what they're doing. I included everything in the BOM except the actual trains just so nobody runs into sticker shock half-way through the project. If you already have the track and the electrical stuff then you already have half the stuff you need.
| Item | Qty. | Cost (ea) | Total |
|---|---|---|---|
| 1/2" x 36" Poplar Dowel | 166 | $1.77 | $293.82 |
| 3/4" x 36" Poplar Dowel | 36 | $2.84 | $102.24 |
| LGB 16000 Curves | 16 | $11 | $176 |
| LGB 10600 Straights | 12 | $10 | $120 |
| LGB Power Feeders | 3 | $15 | $45 |
| Power Supply | 1 | $30 | $30 |
| Misc. Hardware (screws, brads, glue, 10 gauge wire, stain, brushes) | -- | -- | $100 |
| Total | -- | -- | $867.06 |
Obviously, there are ways to reduce these costs if necessary:
- If you don't already have the track, checking eBay once or twice a day while you build the layout can yield some good savings on used track. I don't think I paid more than $200 for my entire loop of track.
- Two pieces of LGB 1000 can be substituted for a single LGB 10600. Since LGB 1000 is more common and can generally be found cheaper per foot than the 10600 pieces, you can save some money there.
- I bought my dowels ~15 at a time from Home Depot because I was working on my layout a little bit at a time. You can probably buy them all at once in bulk for a cheaper price from somewhere.
- The vast majority of the cost for the actual layout is in 1/2" dowels, most of which is used for the ties under the rails or detail pieces on the brackets. Significant savings can be found by altering the design to use less wood. While the detail pieces on the brackets don't really contribute much to the strength of the bracket, the ties keep the track pretty stable and give a little room on each side of the track to help catch the loco for small derailments. Remember some locos can easily weigh 10 lbs. each, and that's not something you want smacking you in the head from 8 feet in the air. If you do redesign any of the components, be sure to keep that in mind
Other Thoughts
I haven't had any derailments, but it would be a really good idea to install some kind of wire on both sides to stop a train from falling in the event of a high-speed derailment. Losing a loco from a fall or bonking someone in the head would be all kinds of bad. I never run my trains fast, but if you have kids around your layout that could potentially throw the throttle to full open, it wouldn't be a bad idea to have something up to prevent the train from falling in case of a derailment. You could always attach a bumper of sorts to your throttle as well to prevent it from going beyond a certain position.
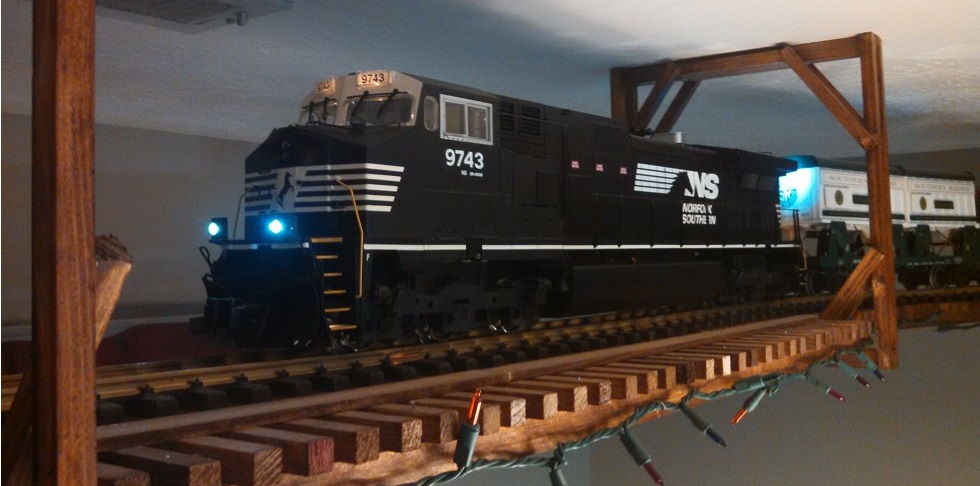
Ta-da
Did minor repairs and tweaked the motor blocks on all 3 ACL F units tonight and added Aristo couplers until I can get some Kadees. They barely hiccupped pulling 6 heavyweights around 8' diameter curves.
Posted by Tom White on Monday, November 23, 2015